While entering Order charges, you may be clicking and tabbing more than you need to. Several features are available to help speed up entering line haul or accessorial charges on Orders. Using some of these features together can automate the task entirely.
Save a Few Clicks When Entering Charges
Do you use the same Freight Item and/or Miscellaneous Item(s) on all or most Orders for any given customer? Open the Customer Setup profile and click the Sales tab. At the bottom of the tab, click Add New. Step through the wizard to add one or more Items to your customer’s Sales Profile. Optionally leave values like Rate or Quantity blank to be filled in manually or by values like Weight or Miles on the Order.
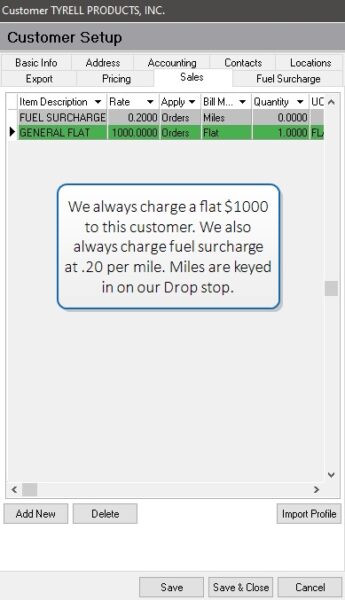
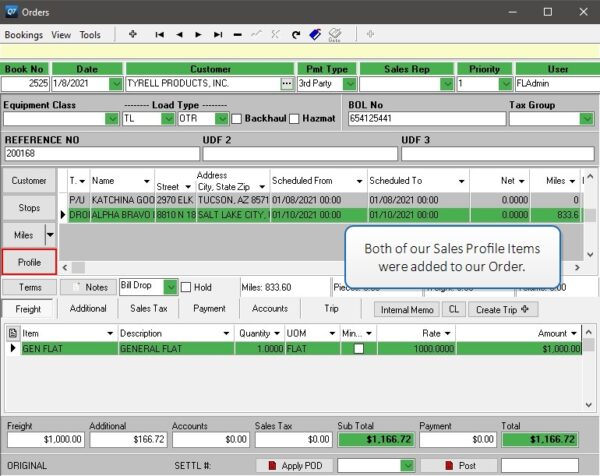
At any time after the customer is added to an Order, click the Profile button to import the Sales Profile. Search Sales Profiles in the Knowledge Base for details.
Freight Rate Charts
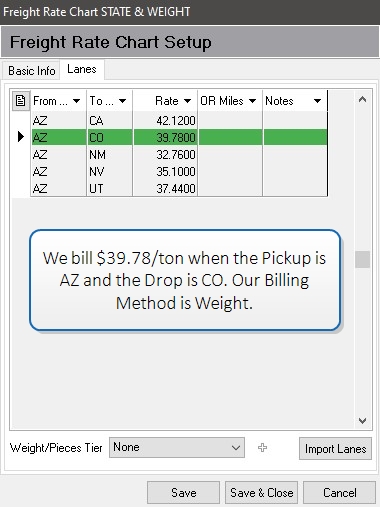
Do you have a pre-determined line haul rate depending on the load lane? For example, you bill $24/ton every time the Pickup is in Tucson and the Drop is in San Diego? Or, you bill $x/mile when the mileage is between 1-100, and $y/mile when the mileage is between 101-200?
From the Main Menu, select Setup > Freight Rate Chart. Create a rate chart that will automatically calculate the line haul rate based on the lane. Set the Lane Type and the Billing Method for accurate calculations.
On any Order, select the rate chart manually, or assign it to a customer to always apply to all Orders for that customer. Search for Freight Rate Chart Setup in the Knowledge Base for details.

You can use these today!
Tools like Sales Profiles and Freight Rate Charts save users a ton of time, and reduce data entry mistakes. With a little time invested in setting things like this up, you can have some, most, or all of your charges automated.